Search results for:
Calibrating The RRampMeter
Buy RRampMeter
Following is the current offset calibration procedure for the RRampmeter. You should allow the RRampmeter to operate for about 5 minutes before calibrating to get the best results. Note that with DCC the current may still not read 0.00. This is because the edges of the DCC waveform actually cause some current flow even if there is no load.
- connect the RRampMeter to a steady DC power source such as a 9v battery. Adjust the DC polarity until the RRampMeter turns on.
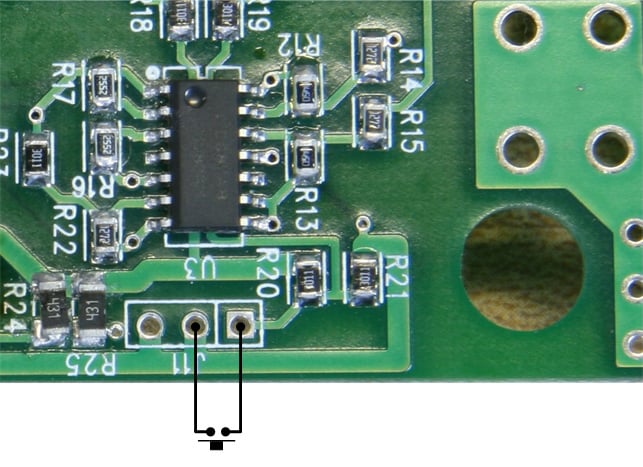
- Temporarily connect togethter the two pins of J11 as shown in the picture. You may do this from the other side of the boards too. A pair of tweezers is an easy way to do this
- Hold the connection until the display reads CAL?
- Release the connection for several seconds and then restore the connection and wait unitl the ? turns off and the screen is blank for several seconds. Release the connection again.
- The display should then show U, then AO, and then return to normal
- The offseet current is now calibrated.